Monthly Archives: November 2013

Super Simple Elf on the Shelf Ideas

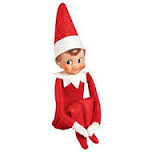
elf on the shelfSo who’s ready to break out their Elf on the Shelf already?

For me, it signifies the start of a beautiful little threat game I like to call: “You better get your shit together, the Elf is WATCHING!”

And besides, the little guy is sorta cute – with maybe a touch of creepy.

There are so many different types of Elves you can choose from nowadays, including precious girly ones! Either way you swing it, the Elf on the Shelf has quickly become a tradition for thousands of families.

Of course, putting your Elf on an actual shelf is easy peasy. Joining in this new found craze of setting up your Elf in certain “situations” to surprise the kids each morning? Plain ol’ exhausting.

But who am I to deny my children at least a few mornings of that crazy Elf’s shenanigans? So here’s a list of simple Elf on the Shelf ideas that you can do or set up in no time and still feel like you’re letting your Elf buddy live up to his full expectations. No mess or complicated shiz = Happy Mom!

The Pooping Elf

Nothing says kid-approved like POOP. Take a bakers cooling rack, lay a sheet of white paper over it and shove the Elf’s feet through the paper and holes of the cooling rack. This will allow the Elf to be put in the squatting position. Put an unwrapped Hershey kiss under his bum. Congratulations, you have a pooping elf!

elf on the shelf pooping

Photo courtesy of The Fancy Stanton

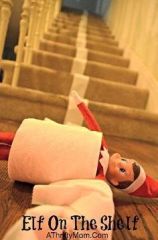
The Toilet Paper Elf

It truly doesn’t get any easier than this. Put your Elf through the middle of a roll of toilet paper and roll him down the stairs. Or if you want to be kind, roll it down the steps first, and then put the Elf in. Who knows, he might enjoy the ride!

elf in toilet paper

Photo courtesy of A Thrifty Mom.com

The Drunken Syrup Elf

All Elves love sugar. Everyone knows that. All kids love sugar. Everyone knows that too. This syrup slurping elf is pretty self explanatory but is still way up there on the cuteness factor.

elf syrup

Photo courtesy of JennaBlogs.com

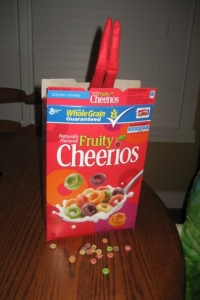
The Cereal Overdose Elf

Another super simple idea. Take any box of cereal, open it up and shove your Elf face first into the bag. Make sure his legs are sticking up though! A few pieces of cereal around the box gives a nice effect.

elf in cereal

Toilet Paper TREE Elf

An alternate version of the Toilet Paper Elf. If you aren’t too much of a tree freak, like me, you won’t mind winding some toilet paper through the branches to make your Elf appear mischievous. Just make sure your small humans don’t yank the paper down and bring several ornaments along with it!

elf toilet paper tree

Photo courtesy of katieraines.blogspot.com

Held For Ransom Elf

Grab a bunch of band-aids, “tape” your Elf to a wall, fridge, cabinet – whatever floats your boat. Find a super hero toy or Nutcracker statue or anything else that is a bit menacing, and have them stand “guard” around the Elf. Your kiddos can come to the rescue!

bandaid elf

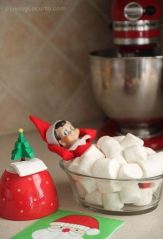
Marshmallow Bath Elf

A bowl. Some mini-marshmallows. An Elf. Done.

marshmallow bath elf

Photo courtesy of LivingLocurto.com

These are just a few of many, many Elf on the Shelf ideas you can set up this holiday season. Don’t be afraid to use your imagination! The kids will love anything you do, so long as they think that sneaky Elf did it all on his own. Happy Elfing!


It’s just been that kind of a day…

who are these kids

Anyone else ecstatic that today is almost over??

5 Easy Ways to Put Peppermint in Your Holiday

There are so many things to look forward to when the holiday season rolls around. Decorated trees, twinkling lights, snow. Hot cocoa, warm-hearted movies, family.

And peppermint.

In general, my life motto throughout the year is

eat-all-the-peppermint-patties-thumb

but when it comes to Christmas, peppermint takes on a whole new meaning. And I try to shove it, stir it or bake it into everything.

That being said, let’s get right to the 5 easy ways to put peppermint in your holiday!

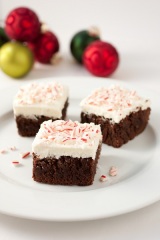
Peppermint Brownies with Buttercream Icing

peppermint-brownies-1

These peppermint brownies by i heart nap time can whipped up in a shake. Probably eaten in a shake too – but it’s Christmas, calories don’t count. So get whipping!

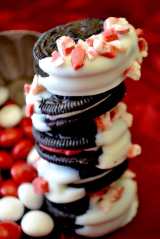
White Chocolate Peppermint Dipped Oreos

peppermint oreos

Peppermint. Oreos. Chocolate. A perfect trifecta? Absolutely. Pink Cake Plate put together these super simple treats that would be great for a holiday gathering or friendly gifts for neighbors. Want to make your own? Pink Cake Plate says you will need:

Peppermint Oreos

White Candy Melts

Andes Peppermint Crunch Baking chips

\Melt the candy, dip the oreos, shake off excess candy, sprinkle with peppermint baking chips. Let harden.  EAT!!!

Peppermint Marshmallow Stirrers

peppermint marshmallows 2

What is hot cocoa without marshmallows? Especially peppermint marshmallows! Bargain Blessings puts together a version that is not only easy to assemble but also perfect for stirring a cup of hot chocolate. All you need are marshmallows, peppermint sticks, white chocolate and red sprinkles.

Melt the white chocolate in a glass bowl in the microwave just until melted. Stir until smooth. Dip the end of each peppermint stick into the chocolate to act as a “glue” and put a marshmallow on the end of each stick over the chocolate end. Dip the marshmallow halfway into the chocolate and then put a small bit of sprinkles evenly over the chocolate. Let cool and store in an airtight container.

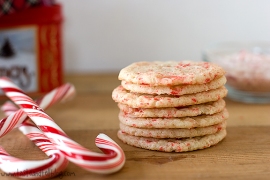
Peppermint Snickerdoodles

Peppermint-Snickerdoodles-recipe

Yeah, yeah. So quick peppermint desserts might be slightly dangerous for our waistlines. To that, I say: Eh, who cares? Especially when you see how easily you can throw together these peppermint snickerdoodles from Pillsbury.

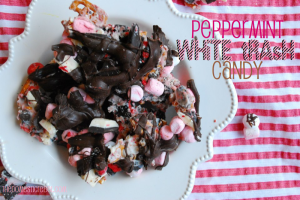
Peppermint White Trash Candy

peppermint white trash

Not exactly sure how I feel about the name, but certainly sure how I feel about eating it. All of it. In my stomach. NOW. This peppermint white trash candy by The Domestic Rebel may just be a new yearly tradition for me. One I may or may not share with others. YUM-O.

I hope that everyone has a very peppermint-y holiday season – and okay, I guess you should probably share some of this goodness with others too. Just be sure to keep plenty of these 5 easy peppermint treats in stock for yourself as well for those long cold winter days!

A Sleek Way to Display Your Child’s Fridge Artwork

When it comes to my children’s artwork, I am truly proud.

I love the pictures they draw at school. I love the pictures they paint after school. I love the “mommy & me” stick figures they scribble before breakfast. And after dinner. And before bed. And whenever they find a scrap of paper under the couch. Or the broken crayon at the bottom of my purse…

But sometimes, it’s quite the artwork overload. And, of course, it’s ALL important. Every last doodle or dot. And where do my small little humans want to put it all?

The Fridge.

So I’ve been in this kind of limbo trying to figure out how to overcome my OCD to make their masterpieces look neat and tidy even though there will be 40 of them plastered to the fridge like wallpaper. I also want to avoid having to repeatedly scoop up fallen papers or hunting down cheap magnets that roll across my kitchen floor. every. time. I. open. the. door.

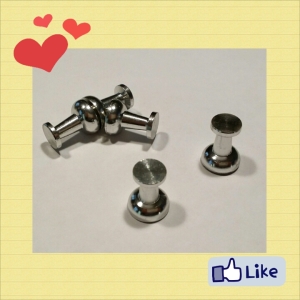
After a trip to my local Office Depot, I found these:

PhotoGrid_1383842760492

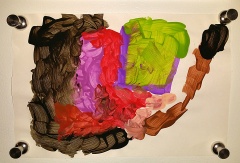
They are push pin magnets! Extremely strong magnets, at that. I can’t get over just how clean and simple and professional they look on my fridge. The best part? They stay put! So I snatched up several bags and went on a fridge “pinning” mission. Displaying your child’s artwork has never been sleeker.

IMG_20131108_085841

Photo courtesy of my Natalie – 3

IMG_20131108_085930

Photo courtesy of my Olivia – 5

If I can spend a good deal of time “pinning” ideas and cute things on sites like Pinterest, why not pin my own real life cute things in my home? Especially when they’re made by my 3 most favorite artists!

Homemade Vanilla Cinnamon Coffee Scent for Your Home

OH. MY. COFFEE.

Just the word itself brings me pure and utter happiness. Add in the subtle scent of baked goods wafting through my house all day on top of that? Fuhgeddaboutit. I’m done for.

But to actually have coffee and baked goods sitting around my house all day? Also, fuhgeddaboutit.

So I found a compromise: a vanilla cinnamon coffee scent blend to make the house smell heavenly – without any ill effects to the butt and thigh region. An added bonus? You can fool your guests into thinking you’ve been slaving away with the hand mixer all day.

do not, however, take any responsibility for the foul attitudes that may ensue once it is discovered that there are actually no yummy treats to be eaten.

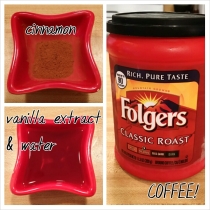
Ready to make your own? You will need:

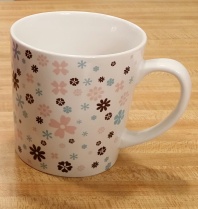
1 ceramic mug

1 tbsp vanilla extract

2 tbsp water

1 tbsp cinnamon

1 tbsp ground coffee

and just in case you need a visual…

PhotoGrid_1383836060234

IMG_20131107_095540

Preheat your oven to 300 degrees. Mix the vanilla extract, water, cinnamon and coffee in the mug and place the mug-of-goodness on a cookie sheet. Pop the mug and cookie sheet in the oven. After approximately 10-15 minutes you should start to smell the most heavenly scent seeping from your kitchen. You can continue to heat the scent in the oven for up to 1.5 hours.

And if you are having any doubts, let’s just say a certain 3 year old of mine has come to me twice in the past 20 minutes to ask me “when the cookies will be done”.  If it can fool my little sweet-toothed girl, it will fool anybody!

Refrigerator Organization Drawers for the Kids

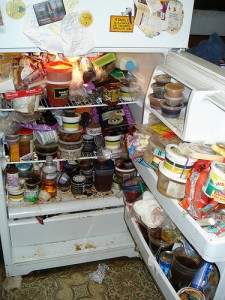
This is NOT my fridge. But it could have been...

This is NOT my fridge. But it could have been…

With a family of 5, my refrigerator is the stuff of nightmares.

We have 5 sets of hands at any given point of the day rummaging through drawers and shelves. Most things get shoved to the back and die a moldy death. Other things get smashed. A few times we’ve even had things topple out and crash onto the floor.

After much trial and error, I realized the problem: All children (and some husbands) suffer from We-have-NOTHING-to-eat-itus.

Even when I’ve just spent $400 at the grocery store that very same morning. And where might this particular disease stem from? From not looking 6 inches past their own noses when they open the fridge door.

So I needed a plan of attack. One that didn’t require me having to run to the fridge every time one of my offspring proclaimed we were food-less so that I could prove them wrong.

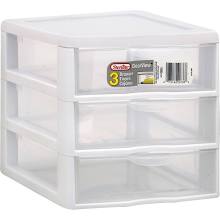
My solution? This beauty:

sterilite drawers

This wonderful 3 drawer plastic lifesaver is… well… just that, a lifesaver.

I purchased my drawer unit by Sterilite from Walmart for just over $5 but these handy dandy things are available for purchase in most any similar type stores in your area. (Just make sure you measure, measure, measure before you purchase one of your own to make sure it fits!)

Wondering what I did with this to make it such a lifesaver? I became a momentary genius and stuck all of the kids go-to foods and snacks in each drawer. And then I labeled each drawer. And then holy light poured from my refrigerator.

Using sticky white labels usually made for file folders, I made a label for:

  • yogurt tubes and string cheese
  • applesauce and pudding cups
  • snack sized bags of carrot sticks, berries or any other snack-y type thing that I could bag myself

Feel free to make whatever labels suit your family’s snack preferences, or don’t label at all. You know their grubby little hands will go sifting through all the drawers every time anyway. Mine do. And sometimes my kids do too…

So now, when my kids are hungry for the 33rd time, they know that they can go to their drawers o’ plenty and pick from a vast array of nutritious snacks. It’s all there. In the drawers. The beautiful, wonderful, labeled, leave-mom-alone-I-can-do-it-by-myself drawers.

I’m currently contemplating putting in a second drawer unit for my husband… will post more on that later if he doesn’t divorce me because of it.

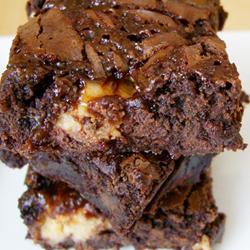
Leftover Halloween Candy Brownies

brownies with candy

Photo courtesy of Allrecipes.com

Yes, I realize it’s only a few days after Halloween… but I’m already sick to death of fighting about candy.

I can no longer fight with myself OR the kids and their incessant requests for “One more piece”. Let’s not even mention finding hidden empty wrappers in their rooms (or mine?).

Perhaps I’m jumping the gun a tad, but when it comes to Halloween candy: I’m OVER it.

I just can’t bring myself to throw it away though… after all, it is chocolate.

If you’re in the same boat, don’t fret. There’s hope yet. You can make Leftover Halloween Candy Brownies!

A pan of these chocolate fudgy treats will bring anyone to their knees! Want to know how to make your own?

You’ll need:

1 box of brownie mix (any brand will do)

A rather large pile of any and all chocolate related Halloween candy that you can steal away from the kids – chopped into smallish sized pieces

A large cookie sheet or foil

A treadmill for after you eat the entire pan…  Kidding!

How to:

Assemble and bake the brownie mix according to the package. When the brownies are finished baking, pull them out of the oven and immediately distribute all of the chopped up candy bars, etc. on top of them. Once the candy is on, quickly put the cookie sheet over the top of the pan to seal in the heat from the just baked brownies. If you do not have a cookie sheet, use a double layer of foil and seal tightly. Do NOT put the pan back into the oven. Turn the oven off. I repeat, turn. it. off.

Let the brownies sit on the counter covered for at least 15-20 minutes until the candy has completely melted. Take the cookie sheet/foil off the pan and with a knife, gently swirl the melted gooey goodness all over the brownies to create a sort of candy “icing”.

You are then left with two choices: Let them cool like a wuss… or devour them in their pure and perfect warmness state. I vote for the latter!

A Thanksgiving “Things I’m Thankful For” Tablecloth

thankful message

When you have young kids, sometimes the best holiday decorations are the ones that include their involvement in creating them. This can also be quite fun for the rest of the family too!

For Thanksgiving in particular, a great deal of time is usually dedicated to prep, cooking, serving and entertaining guests. This usually results in any type of elaborate table decorating getting pushed to the bottom of the priority list rather quickly.

So why not create a personalized tablecloth of your own that will not only spruce up your table, but also get your family involved and allow you to still spend most of your time doing the most important chore of the day: basting!

To get started, you will need:

1 plain white cotton fabric tablecloth – shape and size to fit your style table

1 plastic disposable tablecloth of similar shape and size

Tape that will not harm your table’s finish (masking, painters)

1 pack of Sharpie Stained Brush Tip Fabric Markers (can be purchased on Amazon, Staples, Walmart, etc.) or any other fabric markers that do not wash off of cotton fabric

How to:

1. Before setting your table for the big turkey dinner, lay the plastic tablecloth down, ensuring that it covers the entire surface of the table.

2. Tape the plastic tablecloth to various spots underneath of the table to make sure that it does not slip or move off of the table – this step is very important as you do not want the fabric markers to bleed through the fabric tablecloth that will be laid over it and ruin your tabletop!

3. Lay the fabric tablecloth over the plastic.

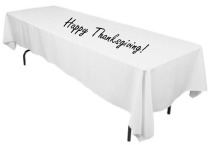
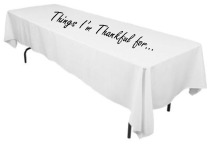
4. Using the fabric markers, write a note or saying of your choosing in the middle of the fabric tablecloth. It doesn’t have to look perfect, but I suppose you could use stencils if you really wanted to.

Some examples of what you could write:

thankful tablecloth 2 jpeg

thankful tablecloth crop jpeg

Whatever fits your family best. You could even freehand a few turkeys or something else Thanksgiving related if you’re feeling really adventurous and artistic.

5. Help your children to use the fabric markers to write a “I’m thankful for” message directly on the tablecloth. Encourage them to draw a small picture, trace their hand and make a hand-turkey, sign their name and also put their age or the year next to it. Make sure it’s not too big, you want to save room for other thankful messages for many Thanksgiving dinners to come! If you have guests joining you, ask them to write a message as well. How fun will it be to look back and see all of the friends and family who celebrated with you over the years. Keep adding new messages every year and watch your white canvas turn into a real work of (meaningful) art.

Be sure to follow all washing instructions on the fabric markers package when cleaning your tablecloth. Most just ask that you wash in cold water and hang to dry.

So there you have it! Your very own personalized Thanksgiving table decoration that you can continue to add to and enjoy!

Redesigned By M

DIY-er who loves to redesign, repurpose, and reorganize just about everything.

My Favourite Pastime

Simple Everyday Recipes

Love. Bump. Life.

Making a Mommy out of Me

The Knitting Neurotic

A great WordPress.com site

Game4Learning

Fun Learning Resouces for Kids

Mommy by day Crafter by night

Surviving Motherhood through Comedy and Camaraderie

Mommy's Kitchen

Surviving Motherhood through Comedy and Camaraderie

Mom Always Finds Out

Notes by a MOM who doesn't know it all, but ALWAYS FINDS OUT about Family Life, Going Green, Organic & Natural Foods and Living, Coupons, Cloth Diapers, Books, Products, Giveaways, Recipes and More!

Moms & Munchkins

Surviving Motherhood through Comedy and Camaraderie

Mommy's Obsessions

Surviving Motherhood through Comedy and Camaraderie

Scary Mommy

Surviving Motherhood through Comedy and Camaraderie

Finding Joy

Surviving Motherhood through Comedy and Camaraderie

The Daily Mom Com

Surviving Motherhood through Comedy and Camaraderie

WordPress.com News

The latest news on WordPress.com and the WordPress community.